Tools required for assembly
Please prepare the following tools for assembly.
- 1 pair of 30mm wrenches or spanners
- 1 pair of 24mm wrenches or spanners
- 1 pair of 19mm wrenches or spanners
- 1 pair of 17mm wrenches or spanners
- 1 x 5mm hex wrench
・Stepladder (or large footstool) 1 unit
1. Assembling the base, support and guide rod parts
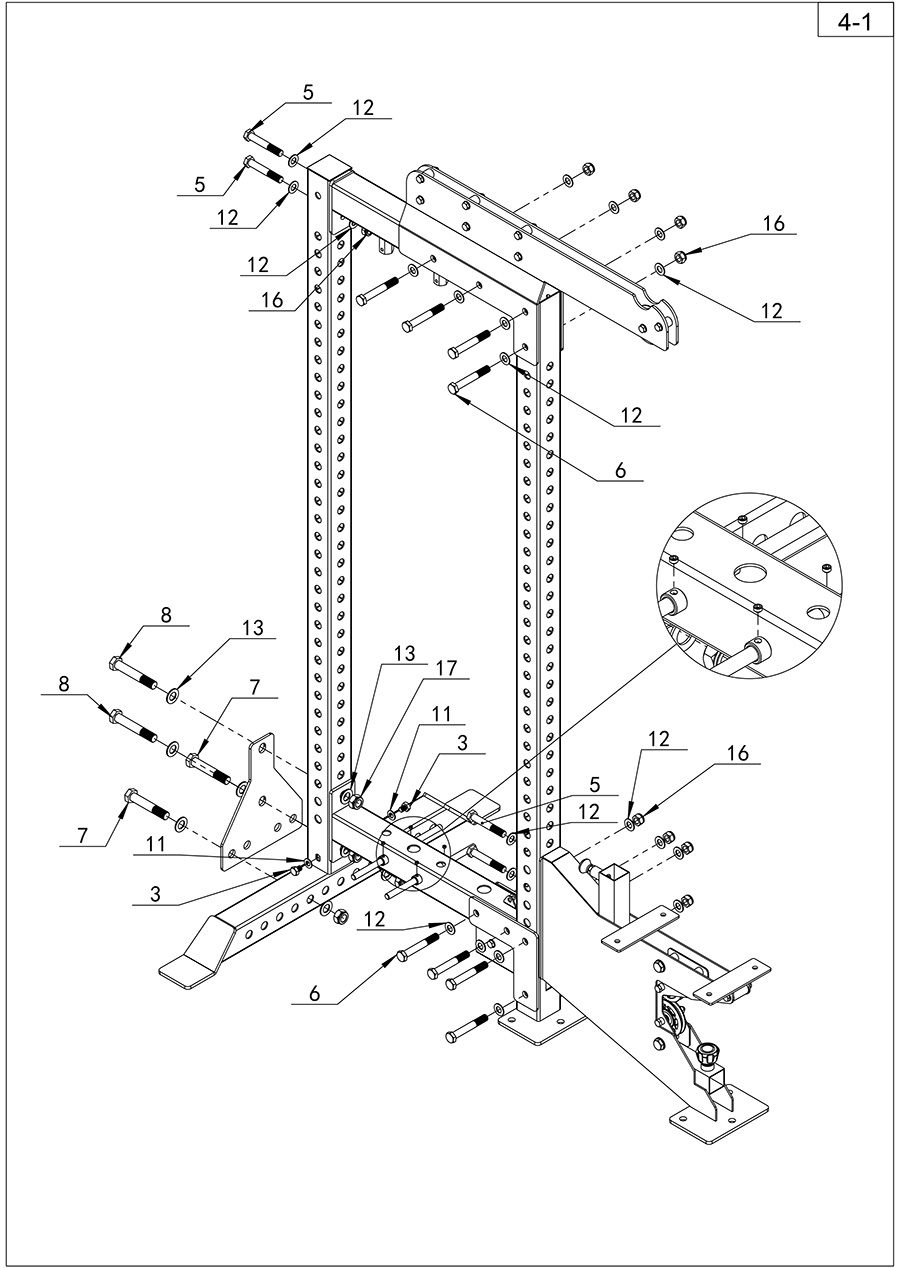

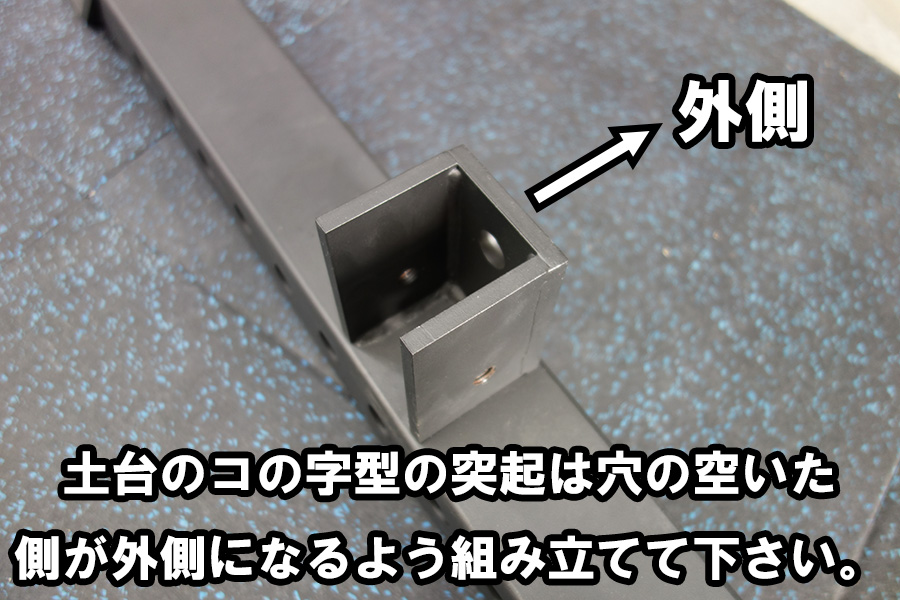
1. First, connect the base and rear support.
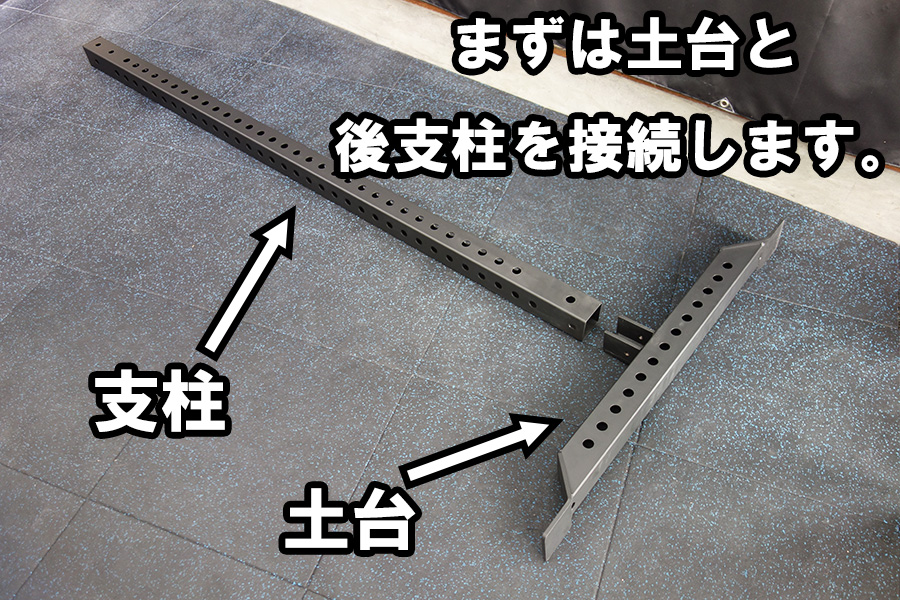
Insert the rear support into the protrusion on the base and secure it on both sides with bolts.
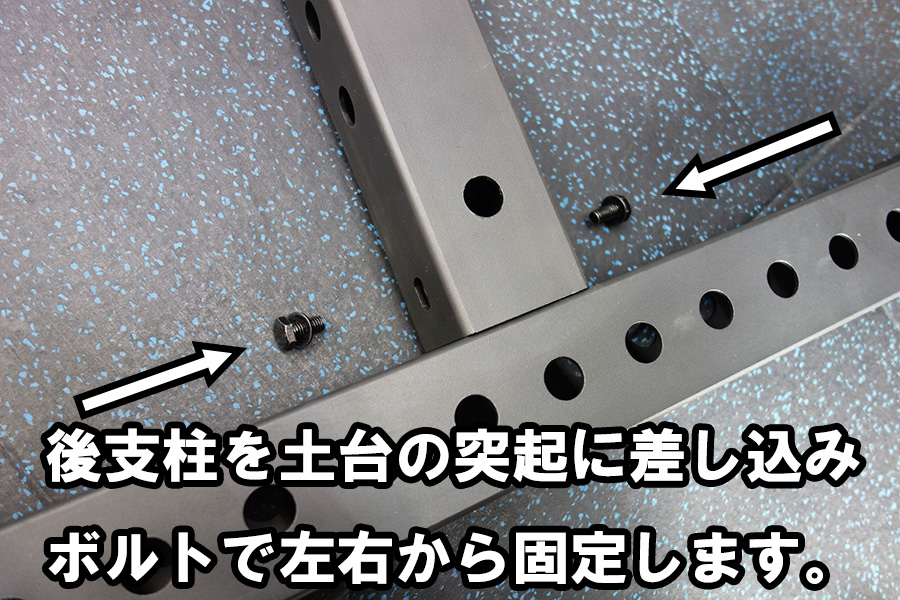
Assemble the L-shaped protrusion on the base so that the side with the hole is facing outward.
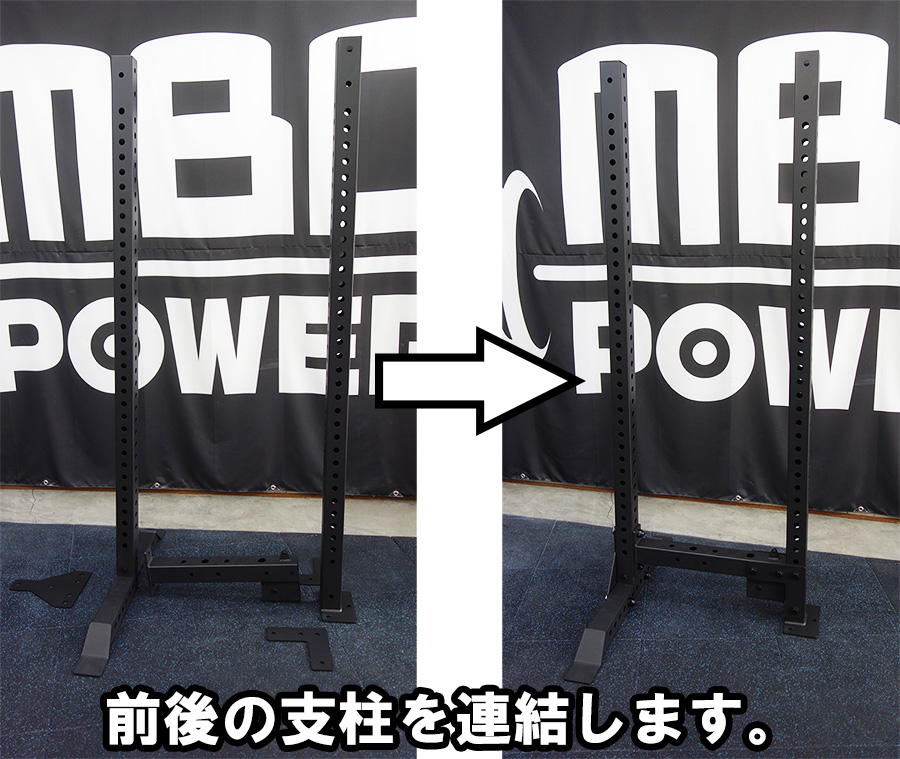
2. Connect the front and rear supports.
This process requires two people; one to assemble the structure and another to hold the posts down so they don't fall over.
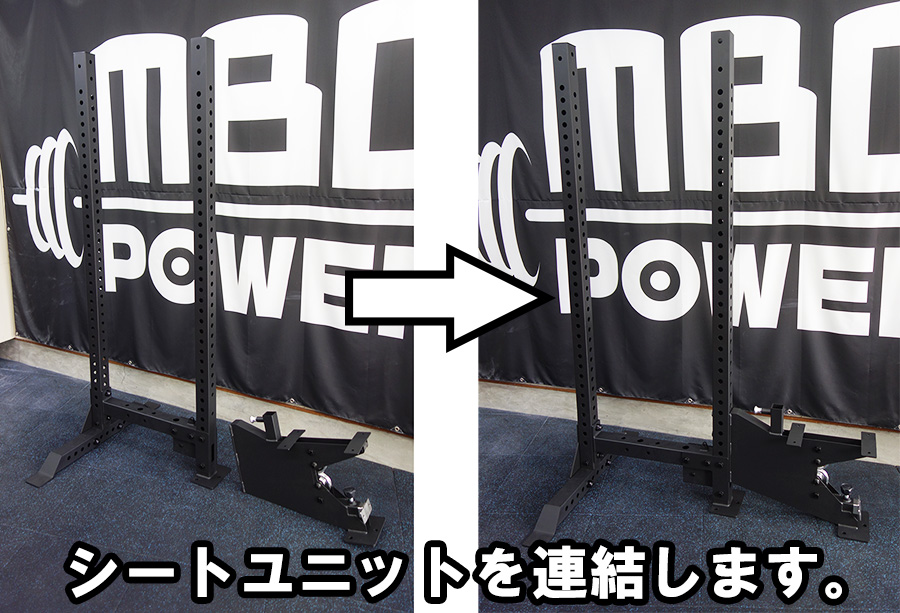
3. Connect the seat units.
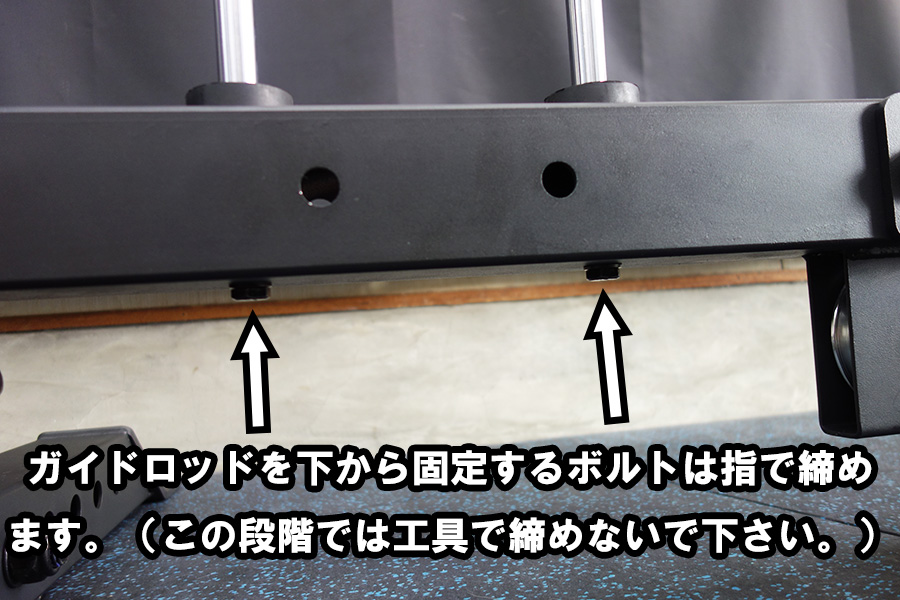
4. Place the guide rod in the assembled frame.
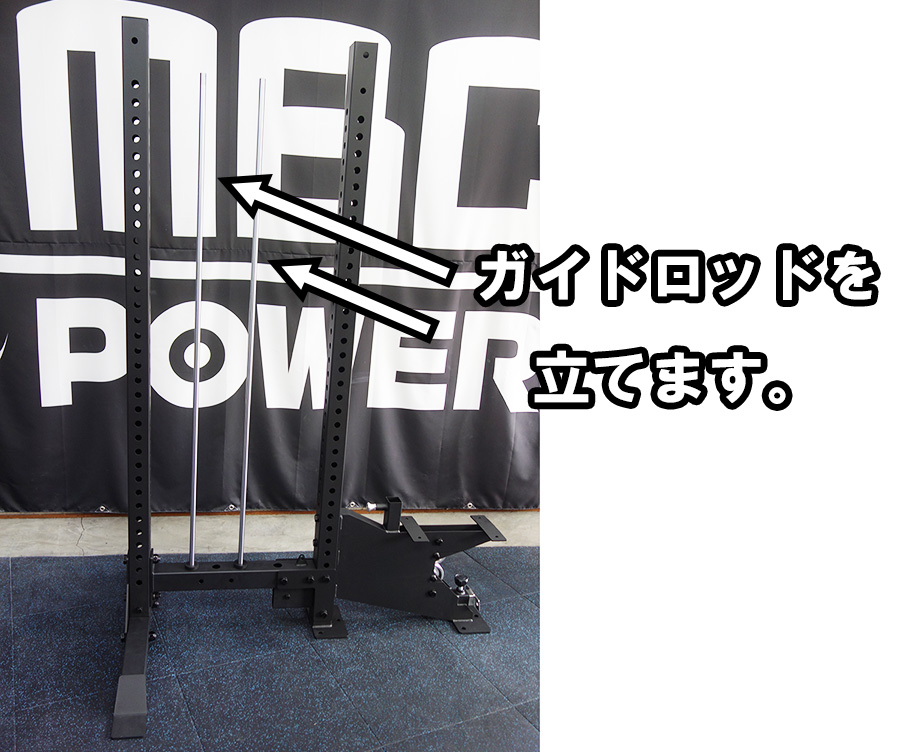
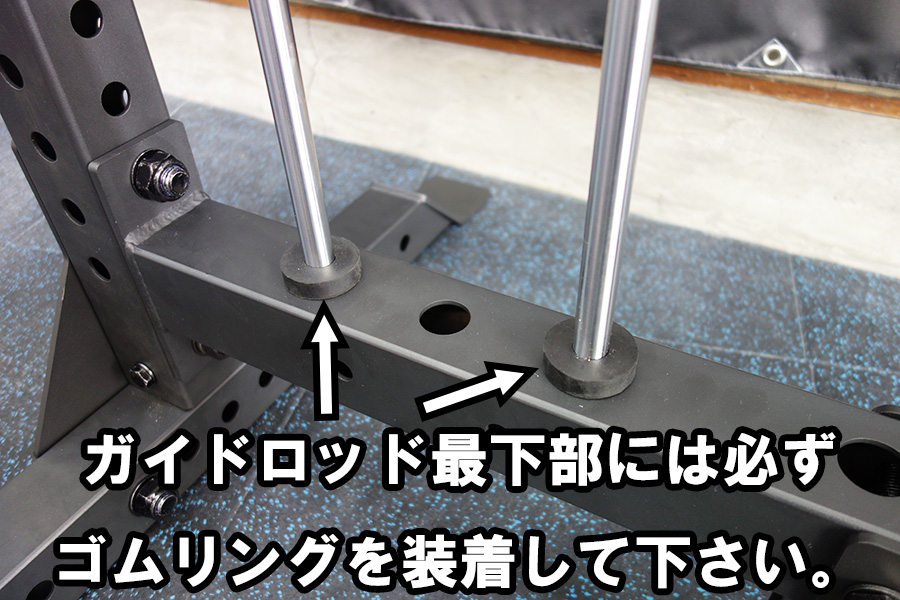
Tighten the bolts that secure the guide rod from below with your fingers (do not tighten with a tool at this stage).
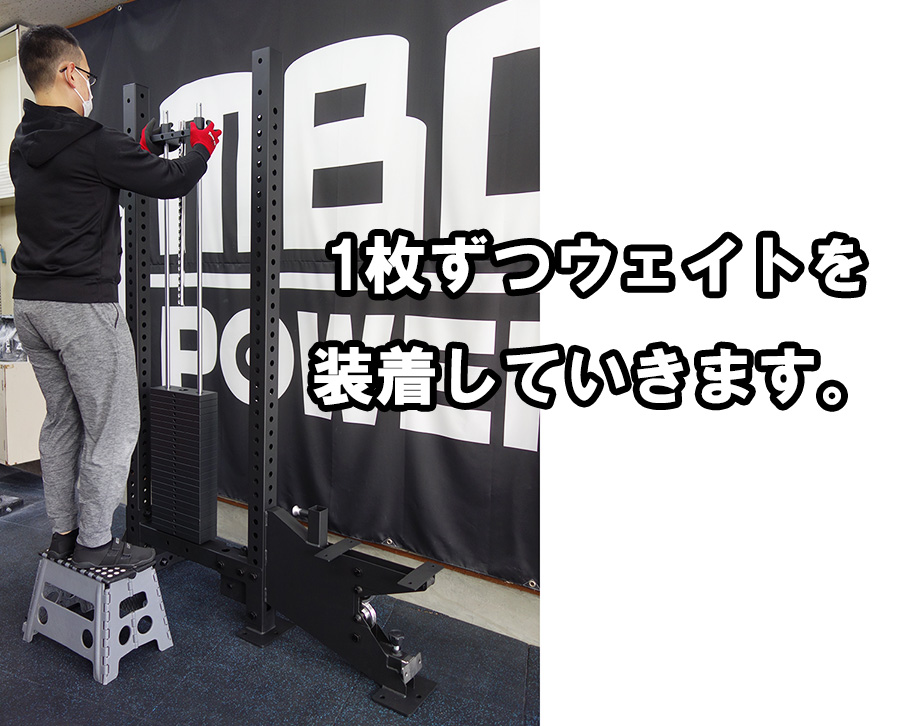
5. Attach the weights one by one to the guide rod.
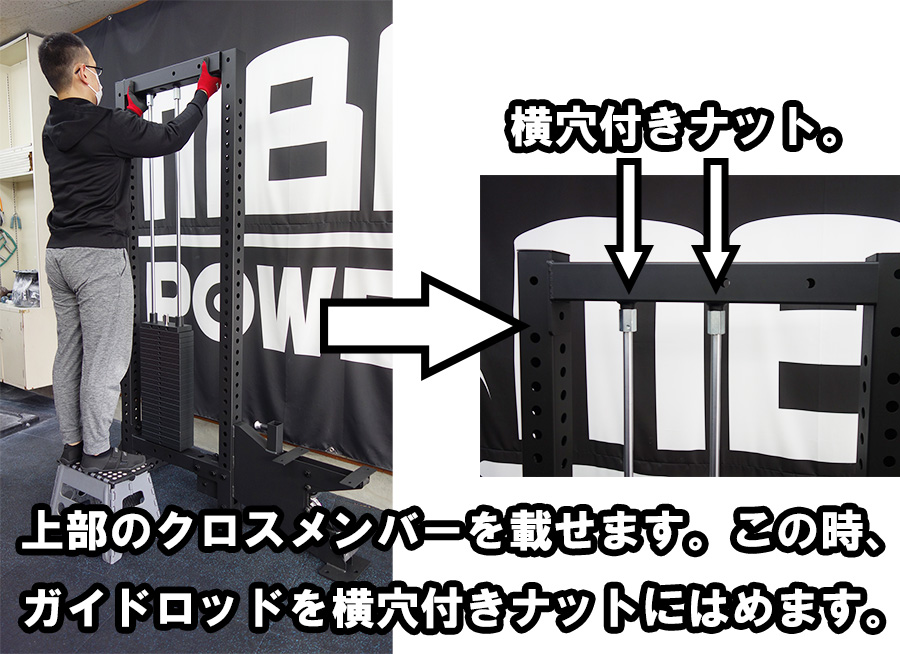
6. Once all the weights are attached, place the upper cross member on top.
At this time, insert the guide rod into the nut with the side hole.
7. After placing the upper cross member, tighten the rear bolts and then connect the upper unit.
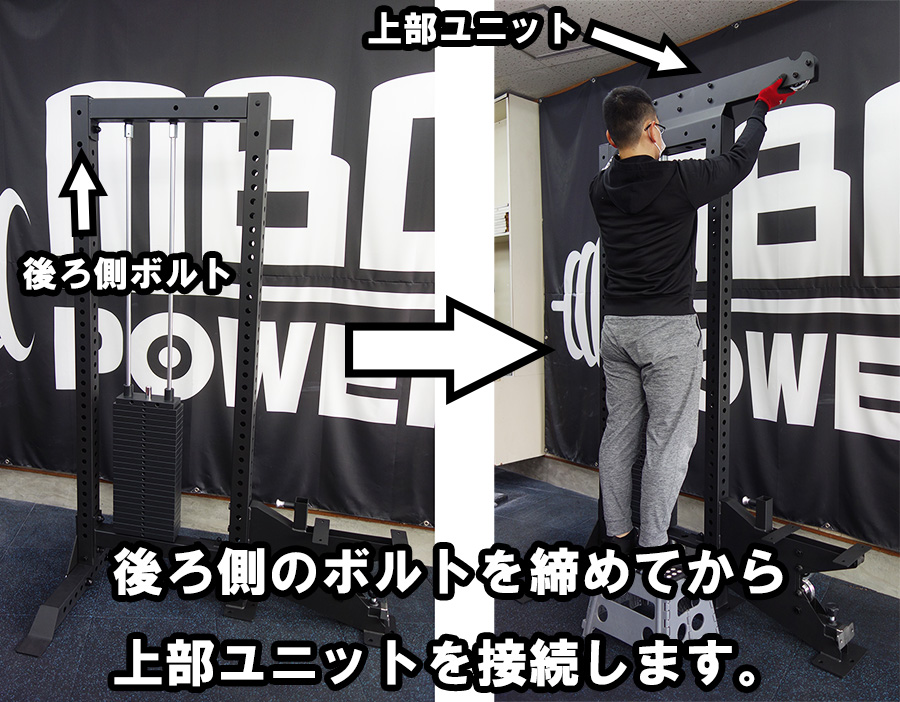
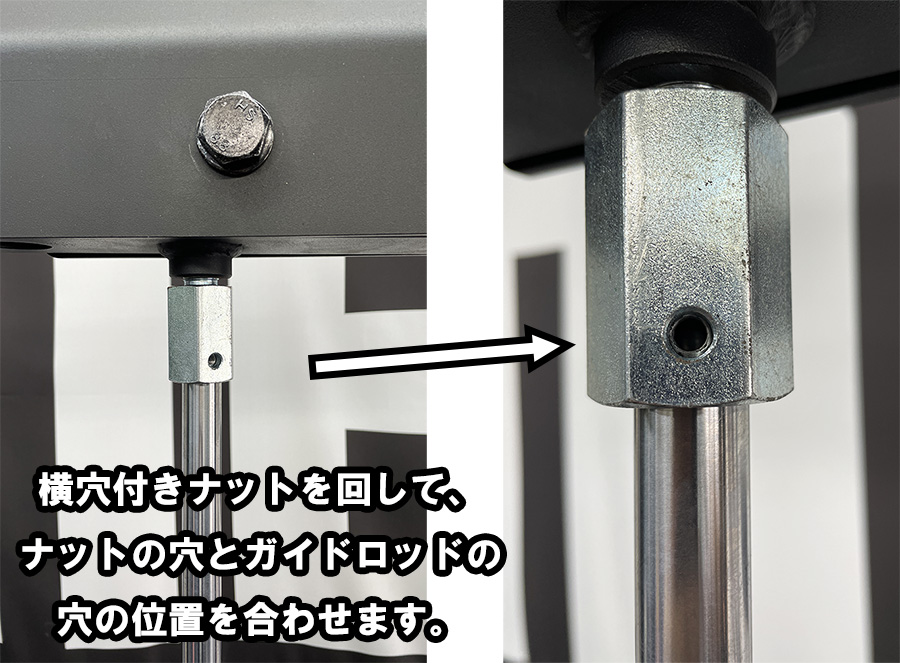
8. After installing the upper unit, secure the guide rod.
First, turn the nut with the hole in it to align it with the hole in the guide rod.
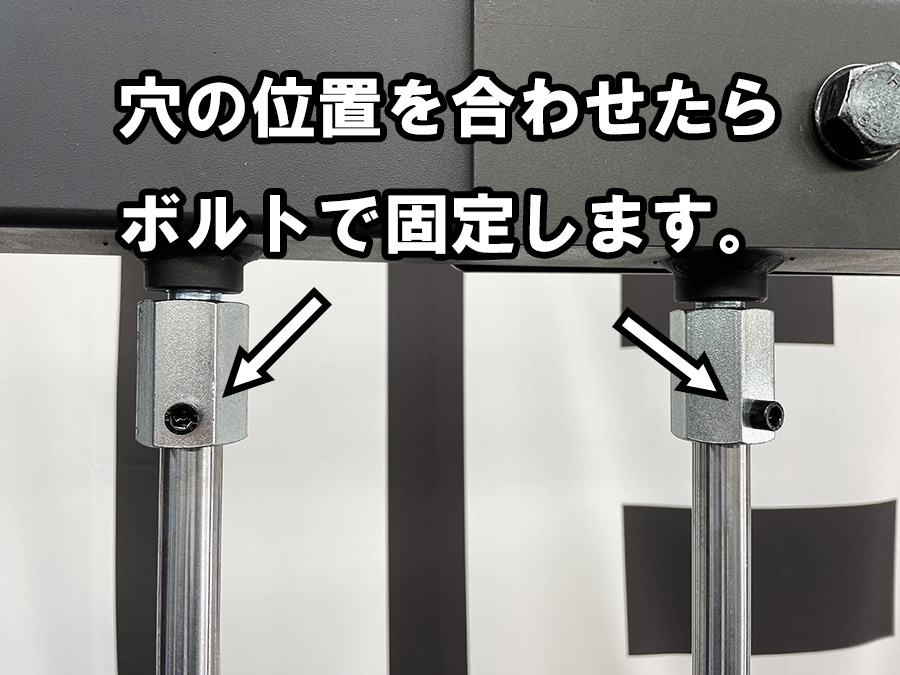
Once the holes are aligned, secure them with bolts.
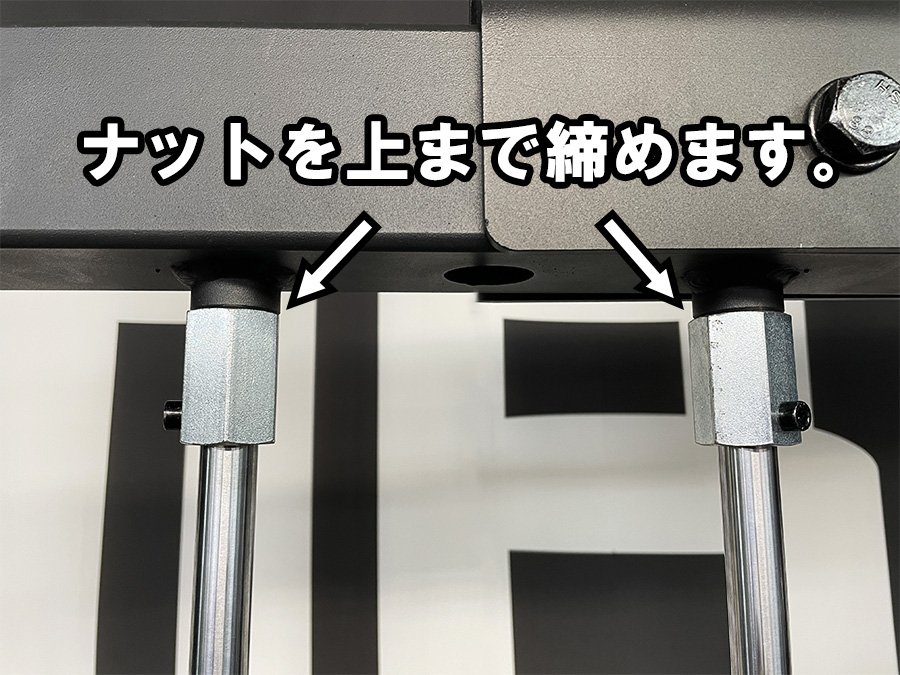
Tighten the nut all the way up.
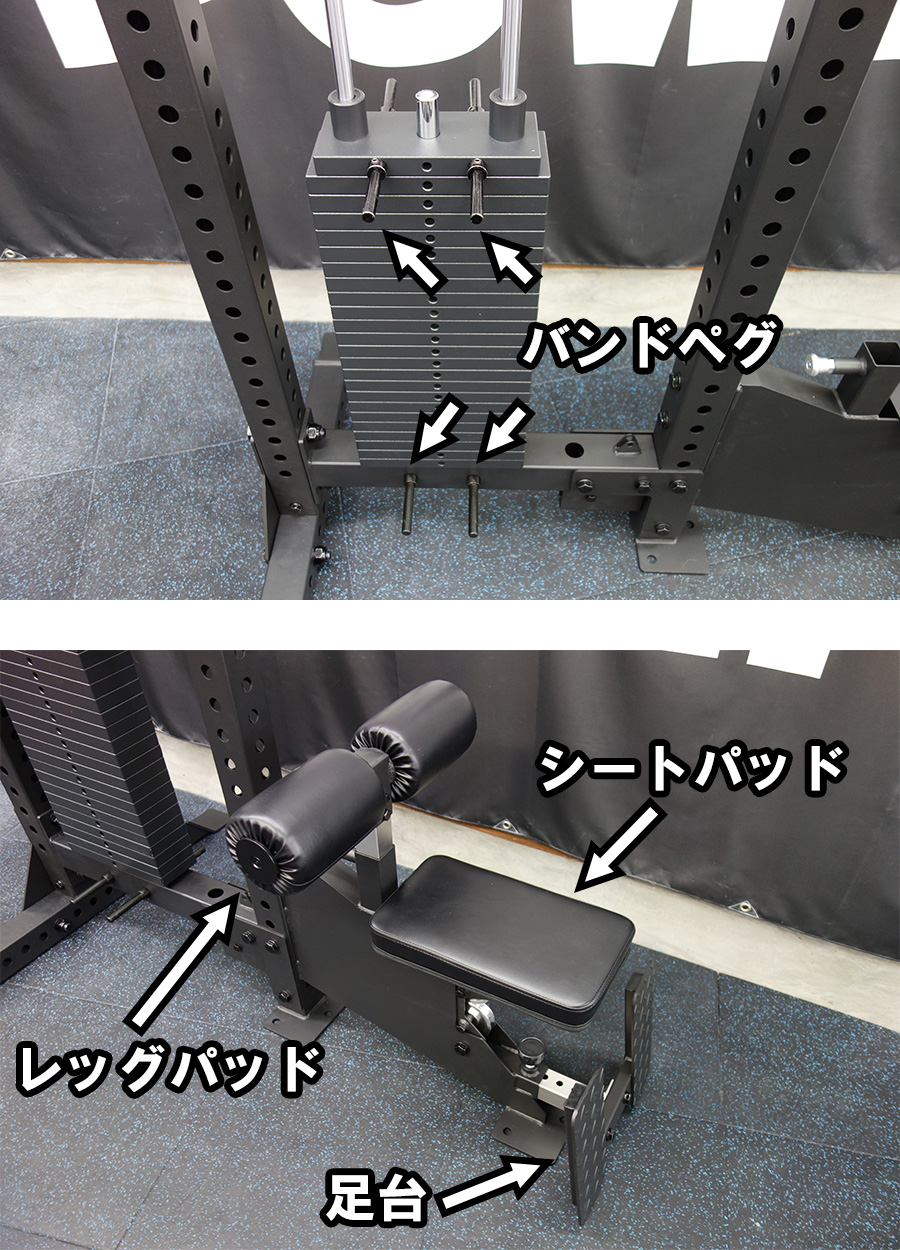
2. Attaching the band pegs, seat pad, leg pad, and footrest
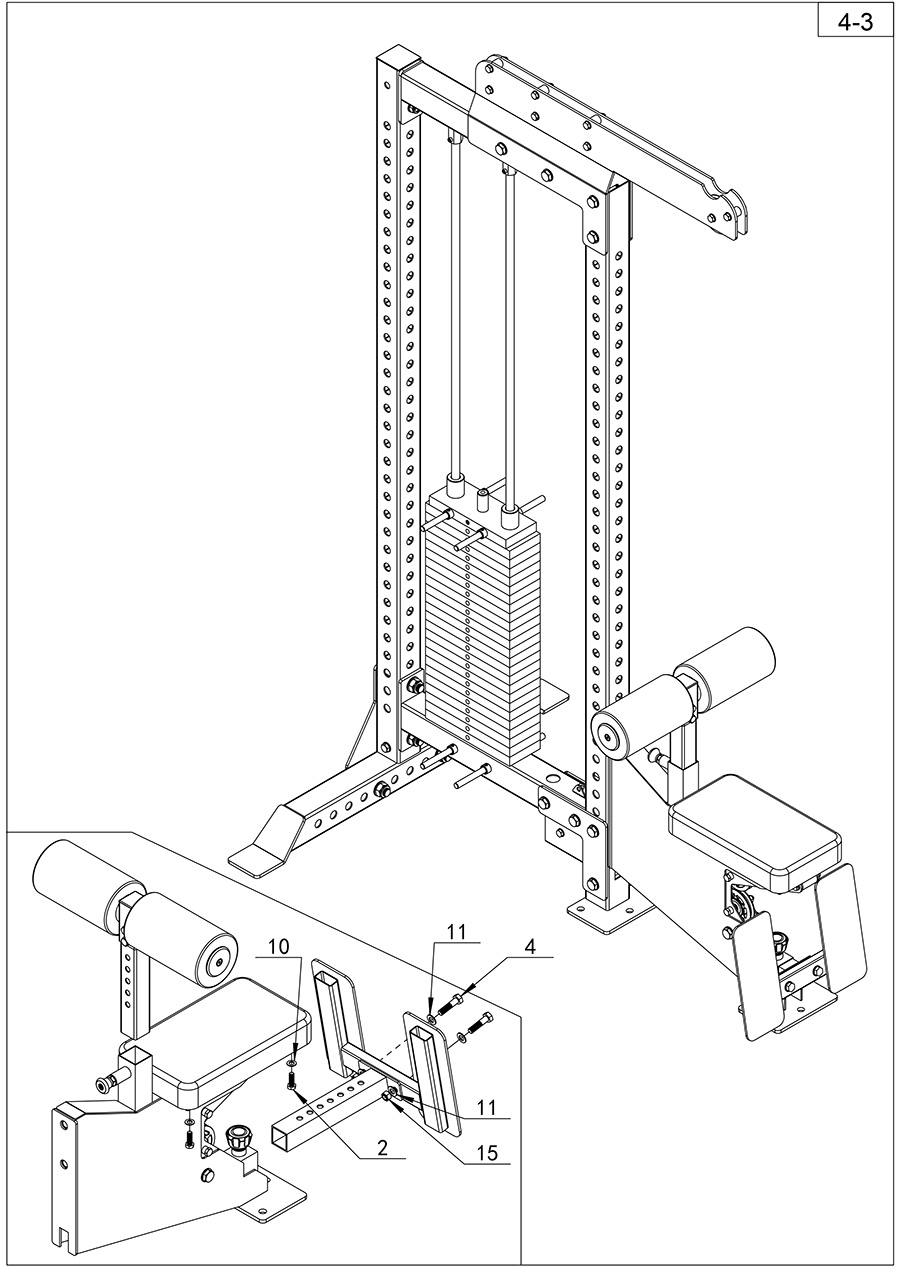
1. Place the band pegs, seat pad, leg pad, and footrest.
3. Cable installation
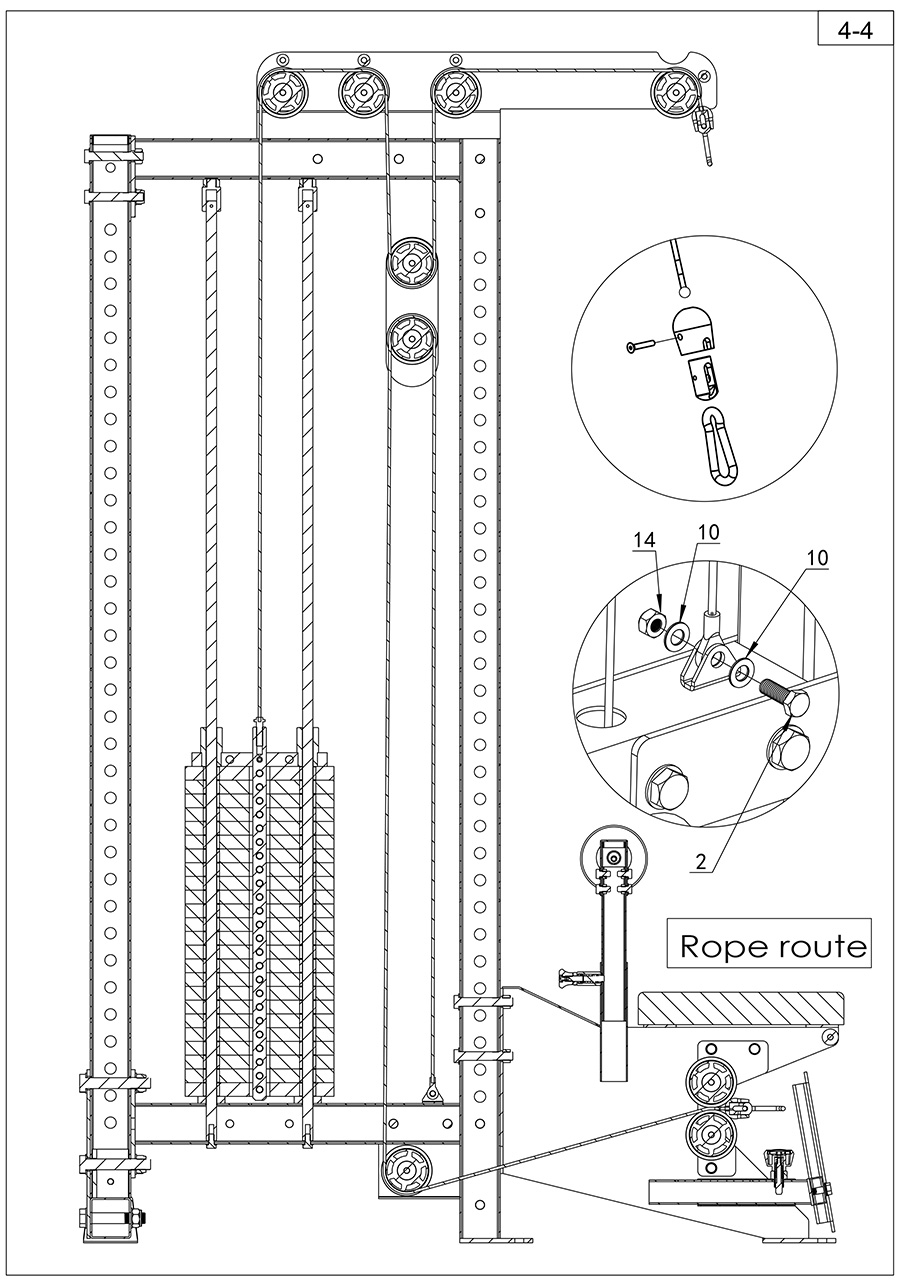
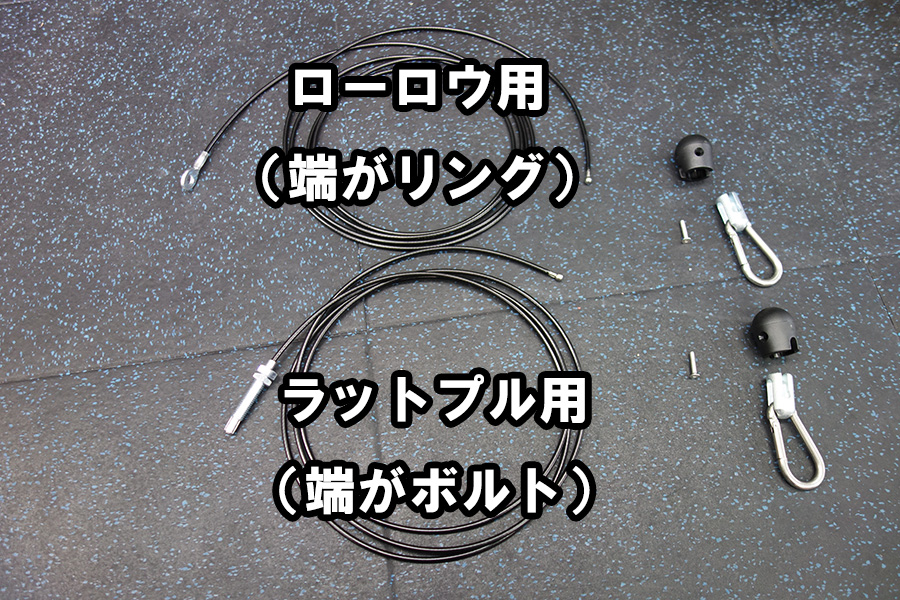
1. Attach the cables in the order of top (lat pull side) and bottom (low row side).
The cable with a ring on the end is for low row, and the cable with a bolt on the end is for lat pull.
You will not be able to pass the cable through with the carabiner still attached, so remove the carabiner before passing the cable through.
When using the lat pull cable, first connect the end with the bolt, then pass it through to the handle and secure the carabiner with the screw.
When using the low-row cable, first connect the end with the ring, then pass it through to the handle and secure the carabiner with the screw.
* Be sure to pass the cable through the correct position . If you pass the cable through the outside of the anti-drop pin by mistake, the cable coating will be damaged after a few uses.
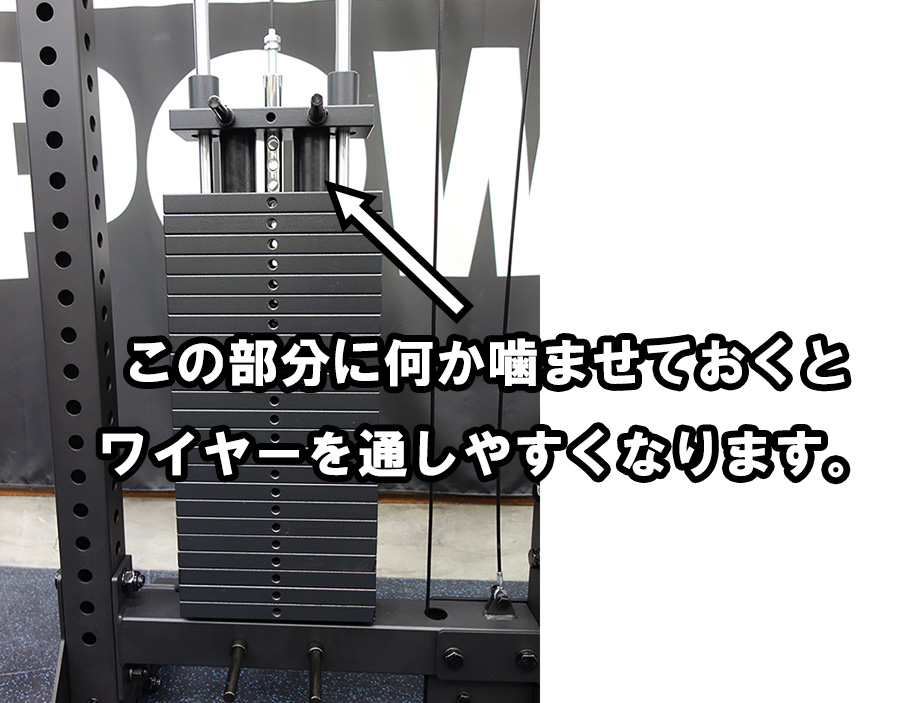
When working, it will be easier to pass the cable through if you place something in the area shown in the photo below the weight stack.
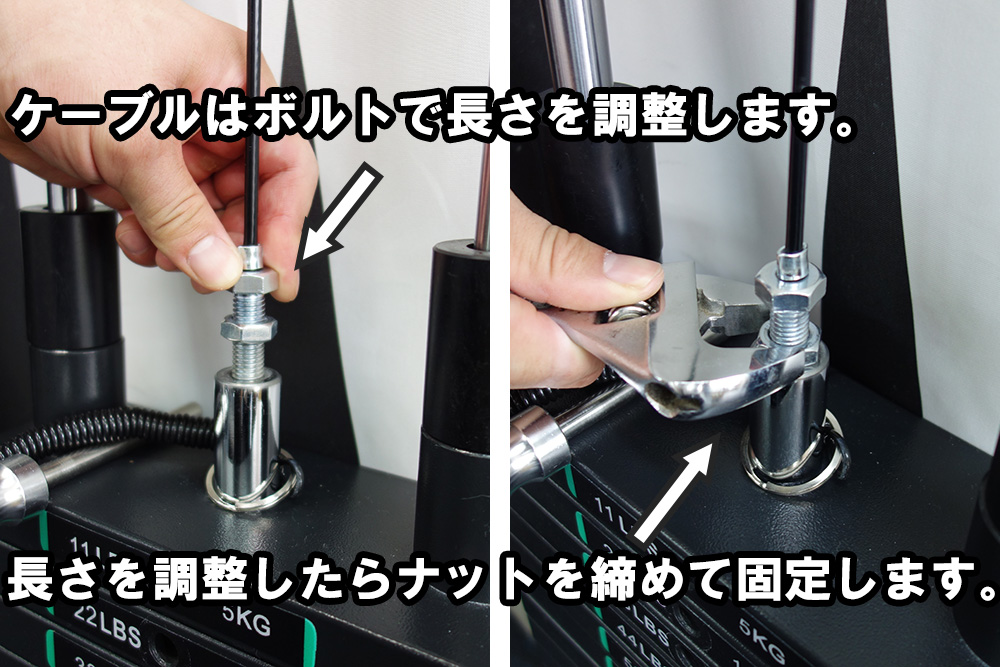
The length of the cable can be adjusted with the bolt. Adjust it to a length with no slack, and then tighten the nut to secure it in place.
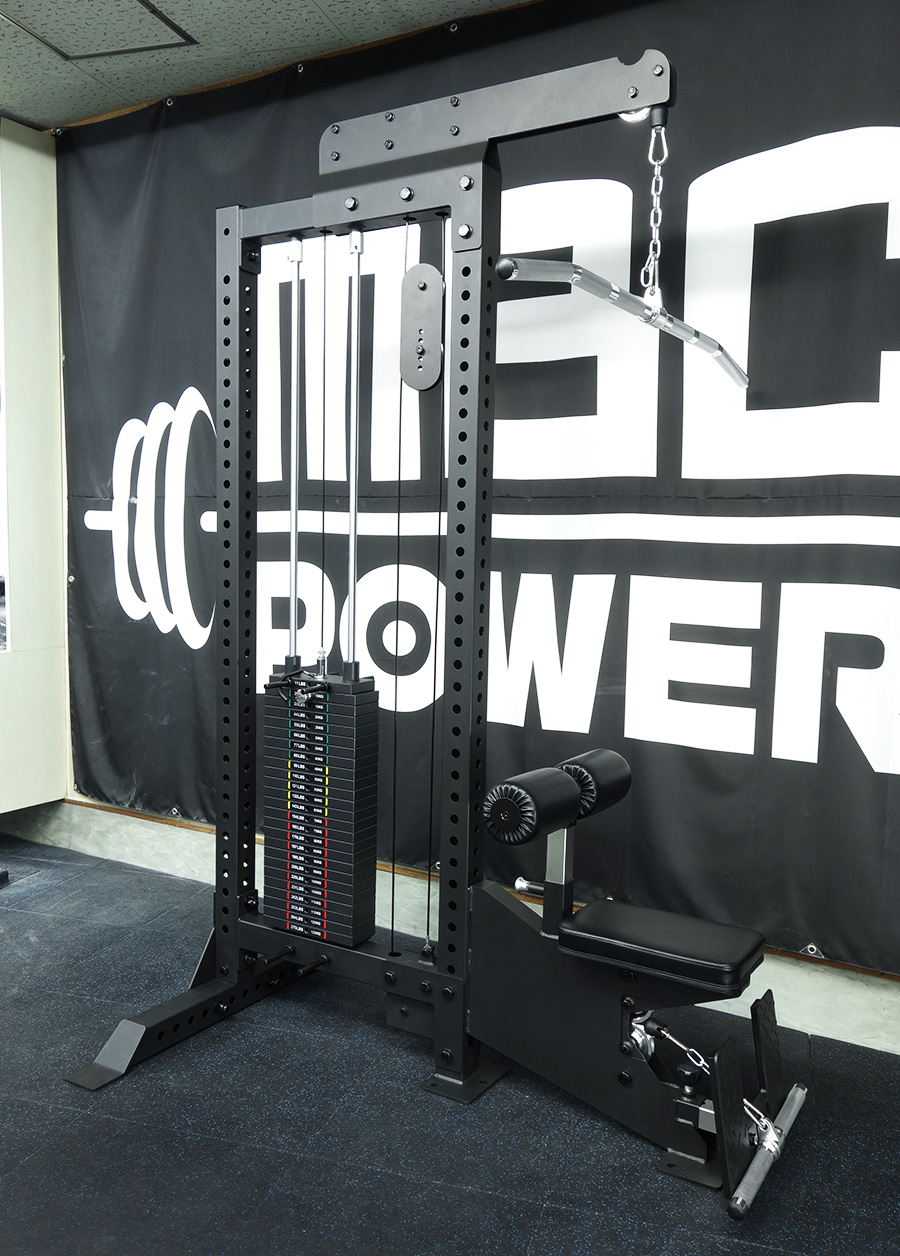
Completed
Finally, attach a sticker to the weight stack plate to complete the set. The top weight stack will be interfered with by the band pegs, so cut off both sides of the sticker only at this part (5kg part) with scissors.